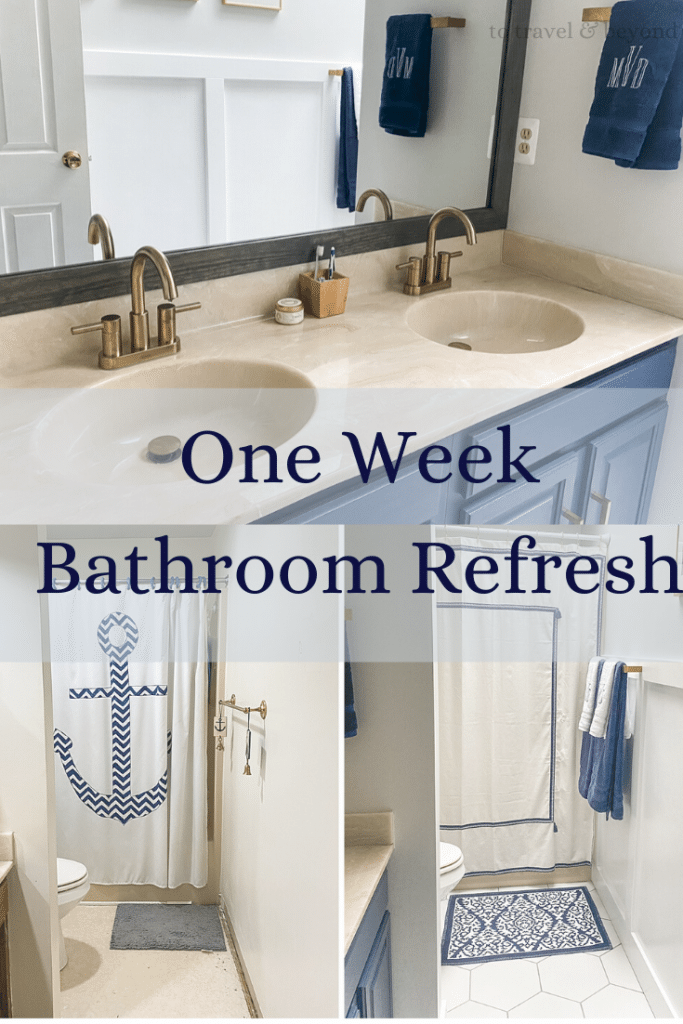
One Week Bathroom Refresh
I’m so excited to start sharing more about what is to come for our home in 2020! We have been talking about these updates for two years and now is finally the time to make it happen. While most of the updates will require the work of professionals, there are a few we are excited to handle on our own. However, we didn’t think we would be starting those smaller projects just yet. When we found out we needed a pre-appraisal before we could start on the large renovations, we knew we had to get to work right away. Kicking off with a bathroom refresh!
The next morning we woke up and started pulling up the bathroom floor, taking down the fixtures, and making our plan. Thankfully, I have spent lots of time over the last two years dreaming (or Pinteresting) what I wanted our home to look like.
To do this bathroom refresh on a smaller budget, we left some of the major things alone: bathtub, sink, toilet. All three of these work perfectly fine (though I would LOVE to update the bathtub and sink eventually) and would cost much more to replace, so for now they stay. The vanity technically also remains but that is where we did some refreshing to change up the look.
Overall, here are the changes we made:
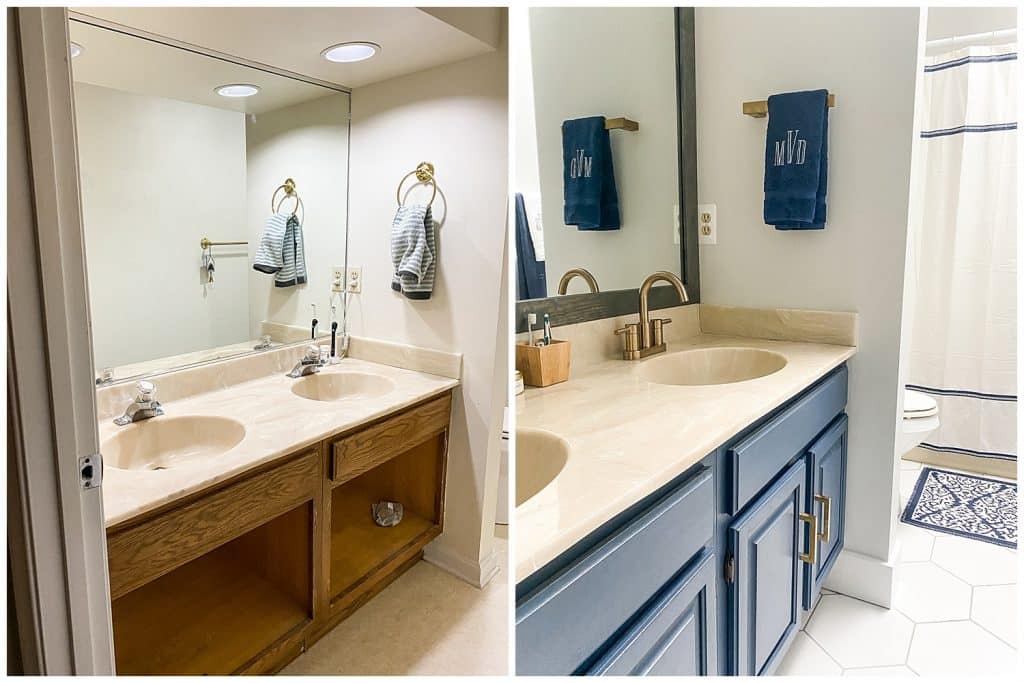
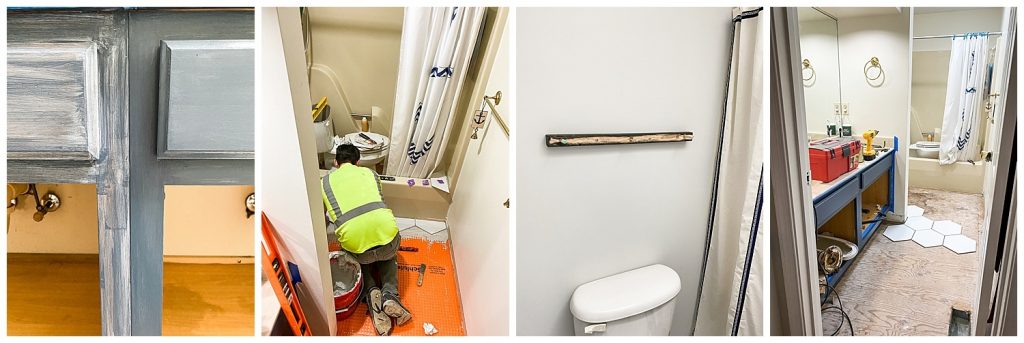
Painted the vanity & updated the handles
The vanity is sturdy, but goodness was it ugly. I’ve always wanted a navy bathroom and we looked into buying one but finding one that fit perfectly, was the right height with the mirror and the currently sink, would have been difficult in a week. So I painted! I removed the doors, sanded the vanity, sanded the doors and removed the handles. When it was time for painting, I did one coat of Killz, then 3 coats of Valspar Midnight Shadow paint. I used a foam brush which worked wonders to avoid streaks and hit those smaller corners. I finished the vanity off with brushed gold handles and love how it looks!
Framed the mirror
I was leaning towards replacing the mirror with two smaller mirrors, but Dave likes the one we have, so we kept it. I knew we needed to update it somehow though. Thankfully, Pinterest has a ton of ideas for framing mirrors, and this was very inexpensive!
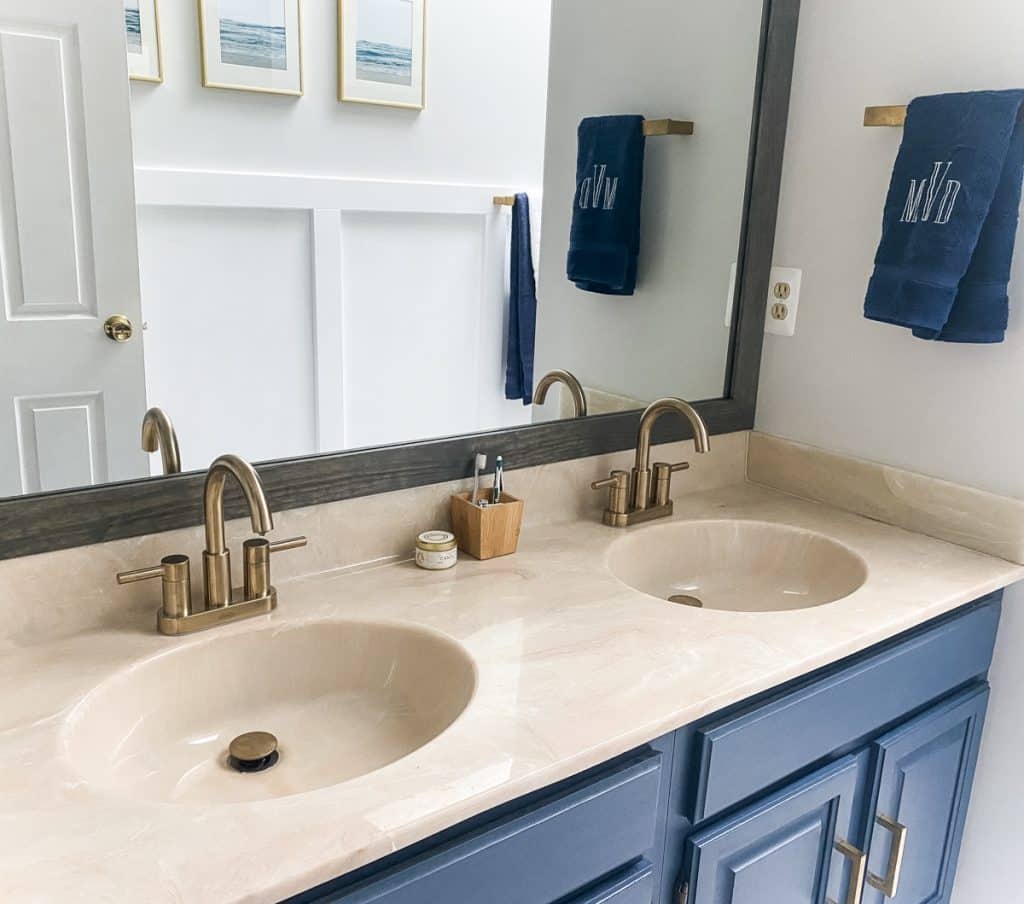
Replaced the faucets
The faucets were awful, straight out of the 80’s for sure. They were old, gross and ugly. I looked for a few days and couldn’t find anything I liked, so I did what I would have done before Amazon and Wayfair and went to Lowes. They had the perfect faucets and they matched all of the fixtures I had ordered!
Installed framing on the main wall
We’re going for more of a coastal look for our home so I didn’t think shiplap would fit, but I wanted something that could add a little “drama” to the room. Dave suggested framing and it’s the perfect look for the large blank wall! This was really easy to install too! We bought primed framing wood in 4 inches and 6 inches for the bottom, nailed it to the wall and then painted it with bright white high-gloss paint.
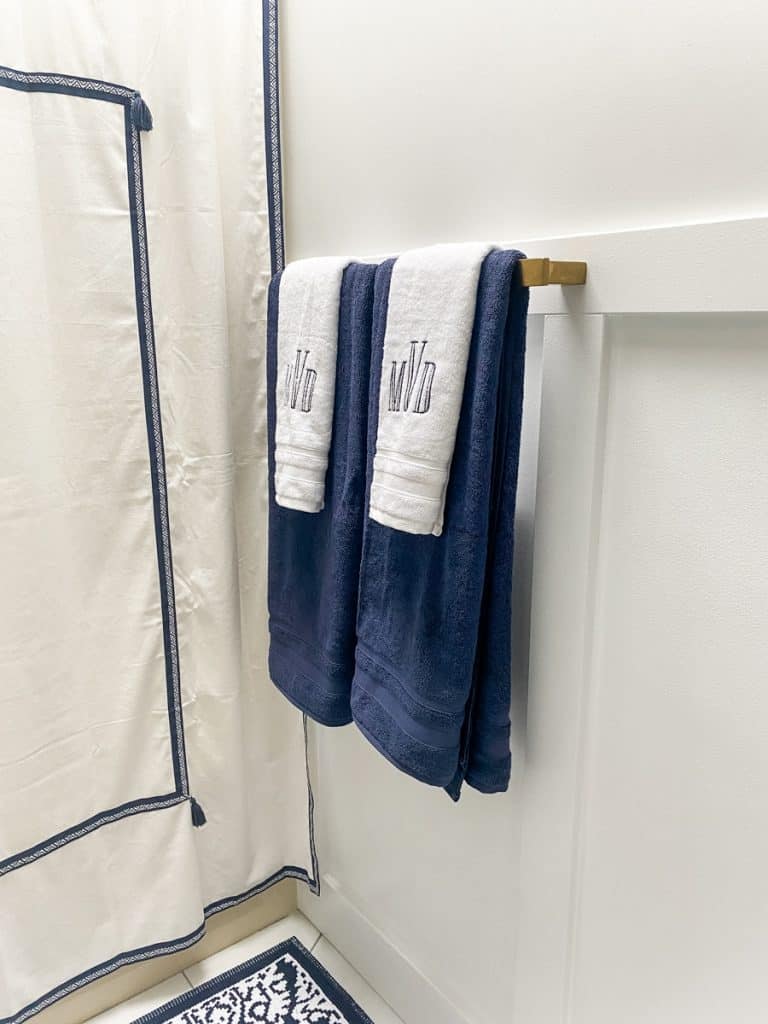
Replaced the “fixtures”
I bought a new towel rack, hand towel holders, toilet paper holder, and hooks for the back of the door. These are all brushed gold to match the handles. I also bought a new trashcan, shower curtain rode and curtain hooks.
Put up artwork
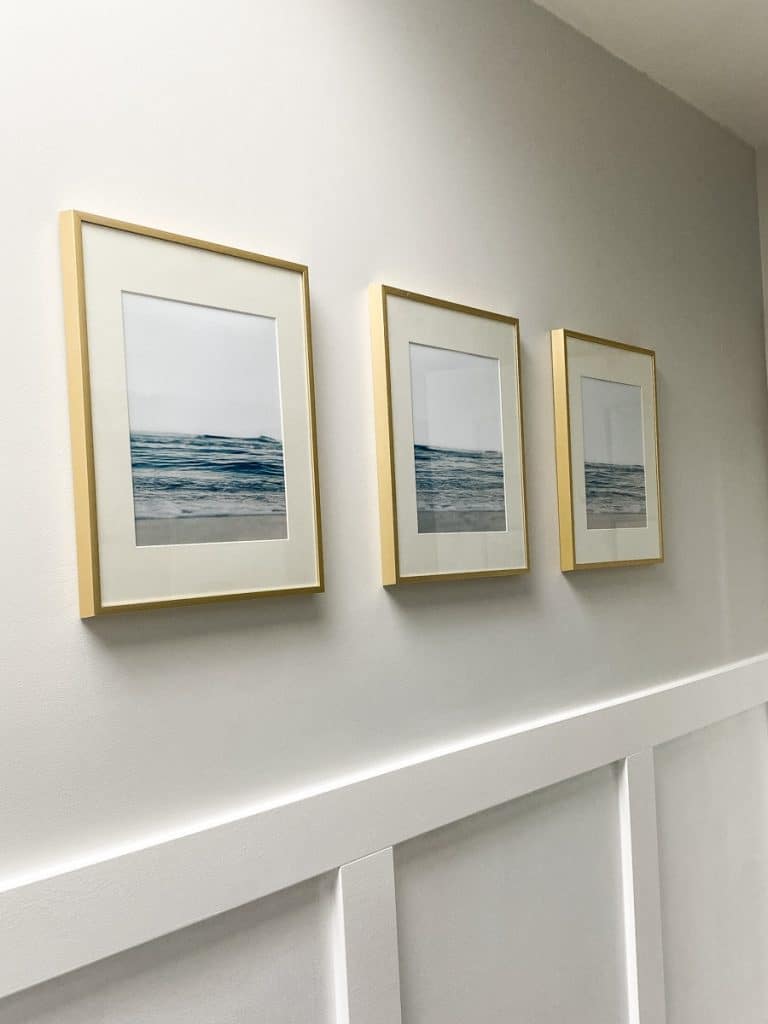
Since I moved in I had the outline of a shark on the wall and vinyl sharks on the toilet. I removed these a few weeks ago so I don’t have photos of them but they had to go. Besides that, we didn’t have any idea of what kind of artwork to buy. I searched for a while and decided on three wave prints and bought gold frames to go with everything else.
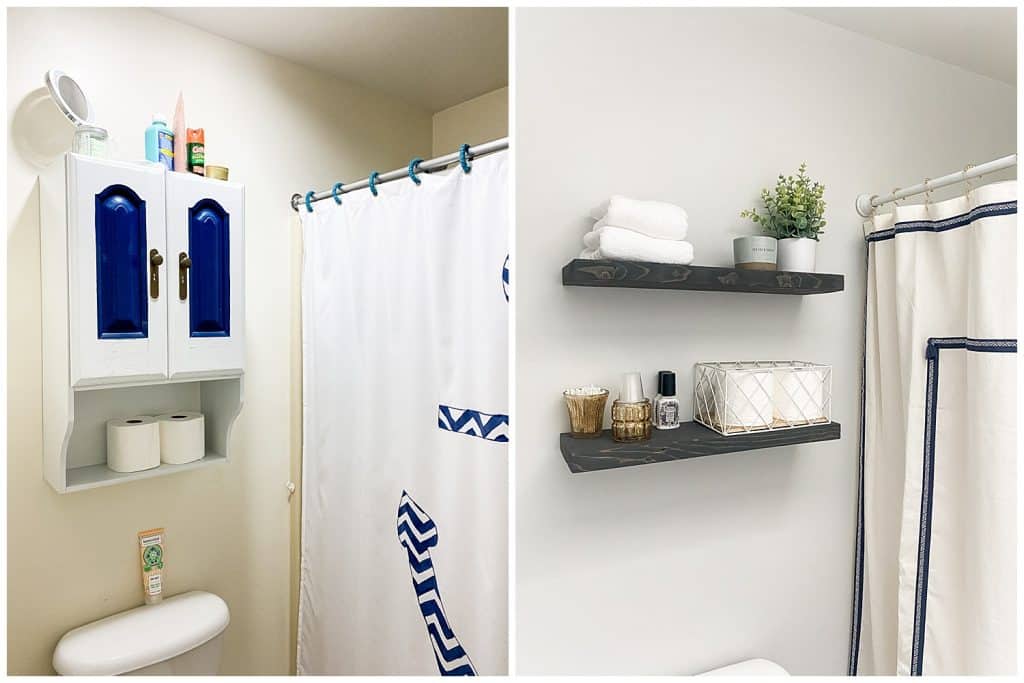
Install shelves above the toilet
We had a cabinet above the toilet which was great because it hid everything, but it also kept so much junk that we truly didn’t need out of sight. We decided on open shelving instead and anything we needed to store would have to fit into the vanity for the time being. I didn’t realize how expensive bracket-less shelves are, and we couldn’t find any we liked, so Dave followed this DIY and made them! We stained it to match the mirror framing and they are the perfect size.
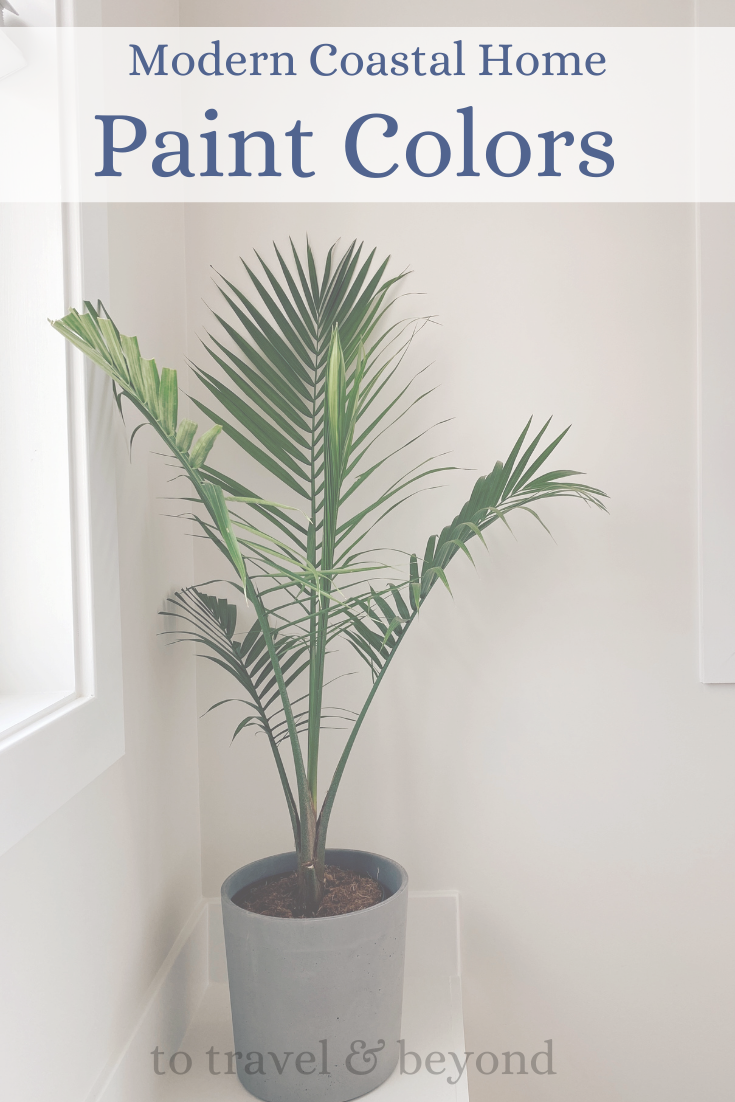
Painted the walls
The walls weren’t terrible, but a fresh coat of paint was a necessity. Once I realized we needed to paint, I decided to change up the color a little. Even though I didn’t need yet another grey room in our home, it’s such a great neutral color, especially against the bright white framing on the wall. We used Comet Dust by Valspar.
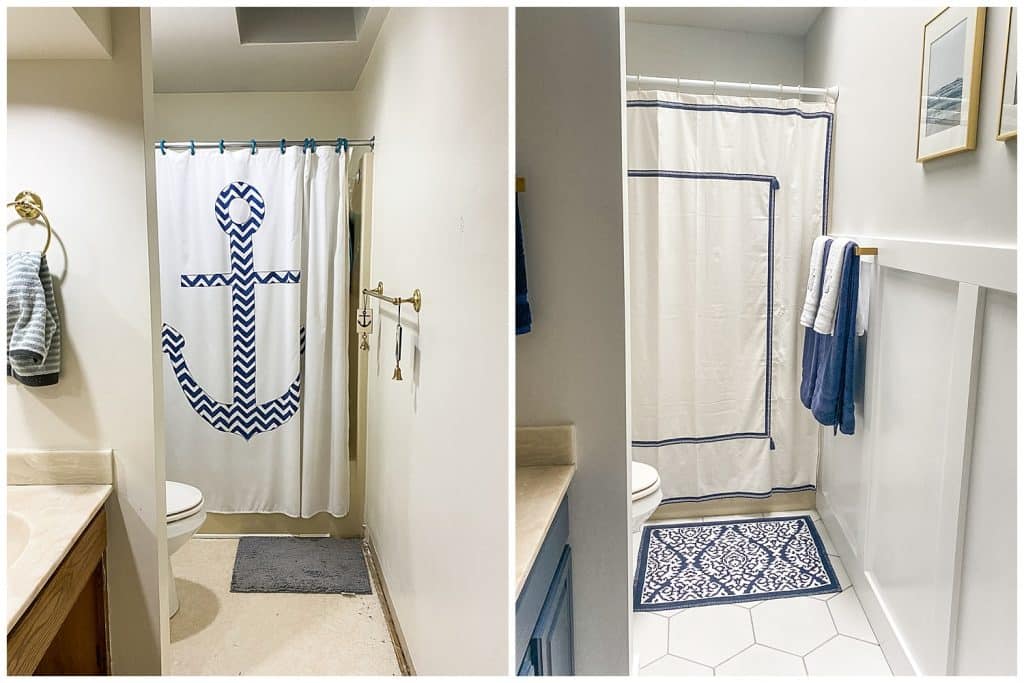
Replace the “fabrics”
I was sad to replace our shower curtain because Dave painted the anchor on it seven years ago! It has been time for a new one for a long while but I was sad to see his hard work get replaced! Choosing a new curtain was actually harder than I expected. I originally wanted a solid curtain, but decided on something with a little bit of detail to bring out the navy colors on that side of the bathroom. I love the tassels! In the end we went with a similar bath rug, which was a nice compromise for the tile I thought I wanted but didn’t get 😉 more on that below. I bought navy towels to match everything as well. Thankfully we hit the 15% off bathroom sale at Target right on time!
Replaced the flooring
I had a very different idea for the tile, I wanted to go crazy and get a patterned tile, which is what I had all over my Pinterest board. However, since we pretty randomly decided we needed to update the bathroom in one weekend, we needed to stick to a budget and we didn’t have a wide variety of options. After consulting with Dave, he mentioned a hexagon tile and I loved the idea! The white tile with grey grout looks better than I could have imagined. I’m so thankful for one of our best friends Josh and my grandfather for helping us with the floor. We likely shouldn’t have picked hexagon for the first time tiling, but with their help it worked out!
I also bought plastic bins to organize what is in the vanity and a liner because the painters tape pulled up the bottom of the cabinet.
And there you have it! Our bathroom refresh in 7 days with a limited budget. In the end we spent under $700 for what we feel like is a totally different bathroom!
Shop the items from our bathroom refresh below: